


Artificial Turf Installation Using the STA-1000 Method
This section contains instructions and pictorals for installing artificial turf with our revolutionary STA-1000 synthetic turf adhesive. Our system utilizes a custom two-component glue for optimal durability and versatility. Please contact Sports Turf Direct if you have additional questions about our products or services.
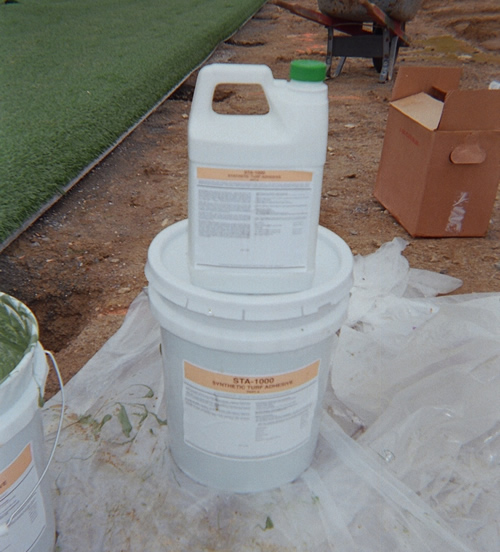 Installation Step One
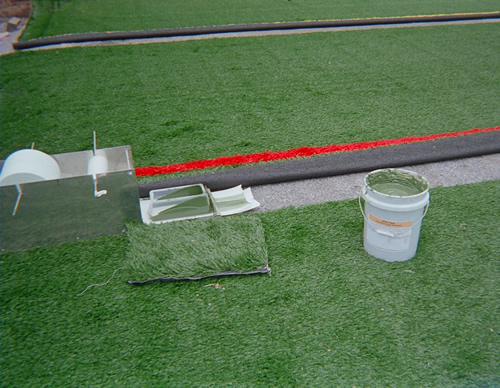
This picture shows the two components that make up our proprietary STA-1000 synthetic turf adhesive. One unit of STA-1000 contains a 5-gallon bucket of part A and a 1-gallon jug of Part B. The two componenets will be combined to create the strongest turf bonding agent on the market.
Click here to view larger image
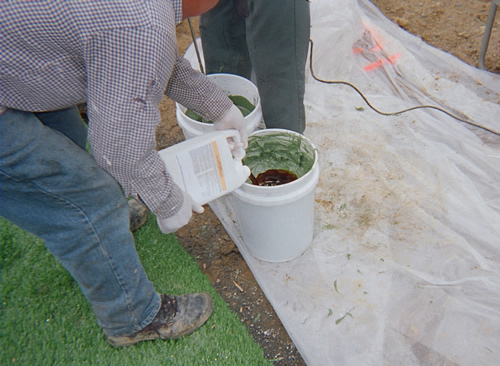 Installation Step Two
Pour the entire contents of the 1-gallon container of Part B into the 5-gallon bucket of Part A. There is room in the bucket to hold the contents of both Part A and Part B, as well as additional room for mixing without spillage.
Click here to view larger image
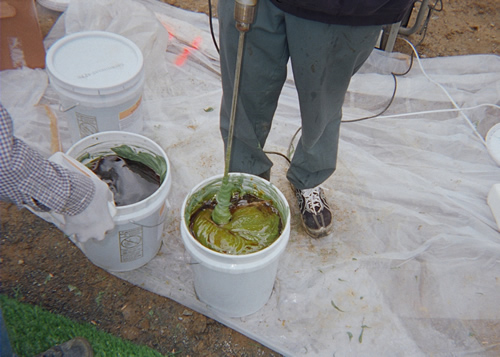 Installation Step Three
Thoroughly mix the two components for approximately 3 minutes. Make sure that it is thoroughly mixed! STA-1000 is the strongest synthetic turf adhesive on the market when mixed correctly. This is the most critical part of the gluing process. The ready-to-use adhesive should have an even consistency, like that of pancake batter.
Click here to view larger image
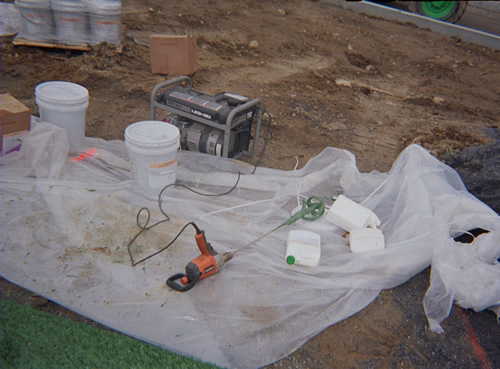 Installation Step Four
This picture shows a typical setup for mixing our proprietary turf adhesive. Use a 1/2" drill with a 5-gallon mixing chuck as shown. A smaller drill will not have the required torque to get the job done.
Click here to view larger image
 Installation Step Five
Here is a picture of a 5-gallon bucket of STA-1000 ready to be used with our Sports Turf Direct glue box. These glue boxes are custom-produced by a local machine shop, exclusively for us.
Click here to view larger image
 Installation Step Six
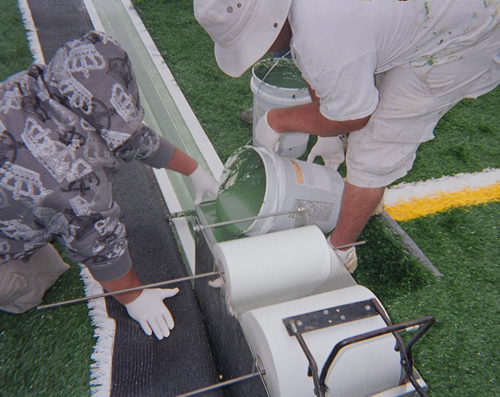
This image illustrates how our glue box works. One worker pours the STA-1000 into the glue box, while a second worker holds the box so that it does not slide forward. A third person (not pictured) pulls the adhesive-coated seaming tape along the length of the seam.
Click here to view larger image
 Installation Step Seven
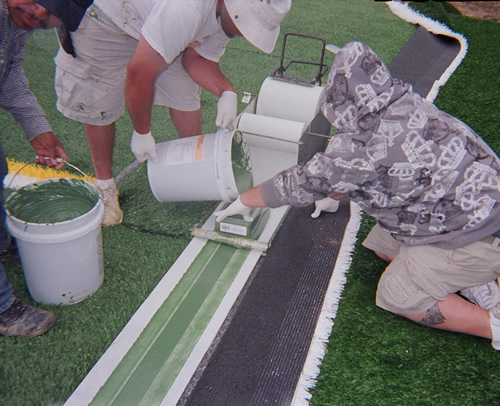
This is a another view of our gluing operation. Note the 3" thick bead of artificial turf adhesive running down the center of the tape. Installtion companies typically make the mistake of putting a thin amount of glue across the entire width of the seaming tape. Synthetic turf seams that are on flat surfaces are not under a tensional load and do not need adhesive 5" into the carpet; they need the adhesive on the critical area, which is the seam itself.
Click here to view larger image
 Installation Step Eight
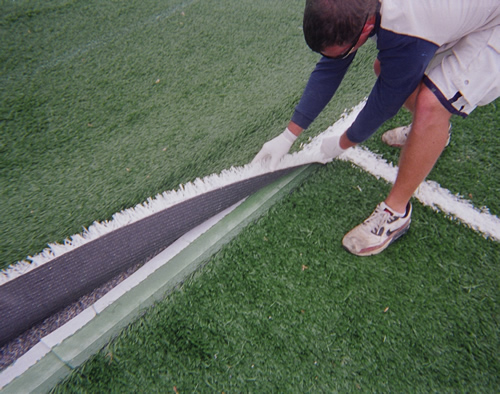
This is a picture of our artificial turf seaming technique. It is only necessary to fold back one piece of carpet. Be sure to fold over the side where the fibers of the turf lay into the seam. Consequently, the side that the fibers are pulling away from the seam should be left on the base.
Click here to view larger image
 Installation Step Nine
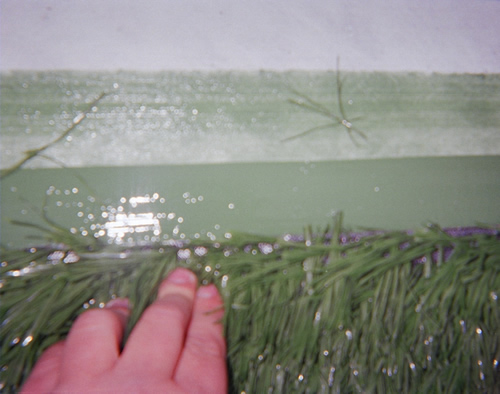
Slide the seaming tape under the side of carpet that is laying down. Set the seam so that the seaming tape and turf adhesive are centered on the seam. Glue bead should be thick enough to mushroom up and over the 1st 1/4" of the topside of your artificial turf. This will not trap fibers but it will create a moisture barrier for your seam.
Click here to view larger image
 Installation Step Ten
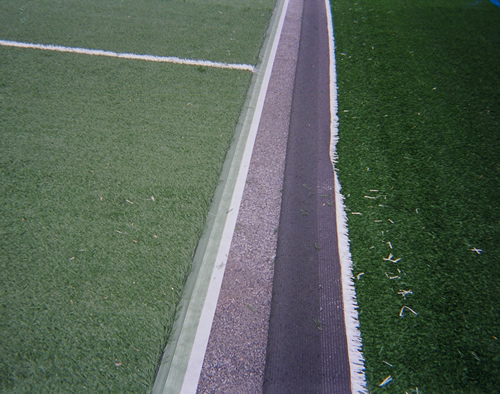
This is a picture of the seaming tape being centered under the first panel of artificial turf. Note that the fibers are pulling out of the seam on the piece of turf that is installed.
Click here to view larger image
 Installation Step Eleven
Now you are ready to flip the second panel over and place it into the artificial turf adhesive. Depending on temperature and humidity, STA-1000 should start curing in 15-30 minutes. Keep your eye on the seam, and once the adhesive has the consistancy of bubble gum, you will want to roll the seam. STA-1000 will be completely cured in about 45 minutes – unless the installation is being done in cold weather, which will make it take a little longer.
Click here to view larger image

